Yoga
AttentionThe Doctrine and Practice of Yoga
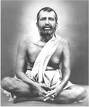
by Swami Mukerji
YOGI OF THE SOUTH INDIA ORDER
 | ||||
Sadhana
The Realisation of Life
By Rabindranath Tagore
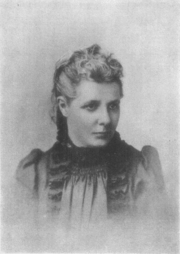
An Introduction
to Yoga
by Annie Besant
- The Unfolding of Consciousness
- The Oneness of the Self
- The Quickening of the Process of Self-Unfoldment
- Yoga is a Science
- Man a Duality
- States of Mind
- Samadhi
- Some Definitions
- God Without and God Within
- Changes of Consciousness and Vibrations of Matter
- Stages of Mind
- Inward and Outward-turned Consciousness
- The Cloud
- Mind
- The Mental Body
- Methods of Yoga
- To the Self by the Self
- To the Self through the Not-Self
- Yoga and Morality
- Composition of States of the Mind
- Inhibition of States of Mind
- Meditation with and without Seed
- The Use of Mantras
- Obstacles to Yoga
- Capacities for Yoga
- Forthgoing and Returning
- Purification of Bodies
- Dwellers on the Threshold
- Preparation for Yoga
- The End
The Doctrine and Practice of Yoga
by Swami Mukerji
Jogi of the South India Order
Patanjali's
Yoga Sutras
Lessons in Gnani and Raja Yoga
The Yoga of Wisdom
by Yogi Ramacharaka

| ||||
Invest in YOU! Discover the ten most downloadable books on our CBMall


Invest in YOU! Discover the ten most downloadable books on our CBMall in the following subjects
BREATHING EXERCISE
Find a quiet place as far as possible, where the air is pure and the
surroundings soothing and pleasant. After a bath or a thorough rubbing
of the body from top to toe, with a wet towel, on an empty stomach,
take this exercise: Send a current of holy thought to everyone, on
planes seen and unseen, north and south, east and west, engage in
meditation--take anyone of the meditation exercises you like. When you
are perfectly calm and relaxed, seat yourself cross-legged, assuming any
posture that comes easiest to you, with head, neck and chest held in a
straight line and the weight of the upper parts of the body resting on
ribs. Keep the region about the waist quite free. Loosen the cloth there
out and out. Now inhale air slowly and steadily through right nostril
after closing left nostril with your finger as long as it takes to count
sixteen mentally. Close both nostrils, holding the inspired air within
and count sixty-four. Then very slowly exhale the air through the left
nostril for as long as it takes to count thirty-two. You must begin with
a 4 second inhalation, 16 second retention and 8 second exhalation.
Instead of dry counting you might improve yourself decidedly by repeating
the word "Fearless" as many times holding mentally that dominant idea
back of the word. Practise 5 pranayamas mornings and evenings for one
week daily. Increase to 10 next week. Work up to 20. Go slowly.
Practise as long as you like, but not less than 6 months. Be serious and earnest.
This is not for non-serious minds. This exercise will augment digestive
power, steady heart-action, make the body light and the mind calm. It
shall help also miraculously in your Soul-Unfoldment. During this
practice be pure in all ways. Observe Bramhacharya. Practice mental
concentration and spiritual meditation. Don't talk much with others.
Don't encourage any but holy society. Don't sleep much. Don't work very
hard. Keep your emotions well-in-hand. Be always engaged mentally
and physically. Be hopeful and cheerful. Never encourage negative
thinking. It shall do wonders for you.
PHYSICAL EXERCISE.
Exercise No. 1
Stand straight, facing a corner of the room with bare feet about 14 or 15
inches from the corner itself, arms straight out, even with shoulders or
perhaps two inches below, hands resting on the two-side walls, chest out, abdomen in. Now lean forward towards the corner, without moving the feet or bending the knees. Aim lightly to touch the corner with the chest, while holding the head and abdomen as far back from the corner as possible, arms and hands slipping forward on the walls in a straight line with shoulders. Resume first position without moving the feet or lowering the arms, and repeat. Make the forward movement slowly, at the same time inhaling through nostrils a slow, full breath; put your whole effort into stretching the chest forward and upward (careful not to bruise yourself against wall) and head and abdomen backward, thus straightening the back at the shoulders. Hold the chest to the corner a moment, holding the breath likewise, then slowly resume original upright position, slowly exhaling through slightly open lips at the same time bending the head forward towards the chest.
As you lean forward toward the corner, mentally keep count of your exercise one, two, three, etc. As you resume the upright position, exhaling and bending the head forward mentally, affirm "I am fearless, pure, strong." Make these movements always slowly, deliberately, with the closest attention. Begin with 5 or 6 movements and raise to 20 at a time.
Exercise No. 2
Stand straight about two feet from the wall. Place the palms on the
wall-level with the shoulders. Without moving the feet or bending the
body, lean forward slowly, inhaling slowly as you do so, until the
chest touches the wall, head back; then push yourself slowly to an
upright position slowly exhaling as you do so. Repeat 10 times or more.
Exercise No. 3
Clasp the hands behind. As you slowly inhale extend the clasped hand
slowly downwards as far as possible, straightening arms at elbow and
lowering shoulders as much as possible, at the same time extending
and lifting the chest as far as you can. Hold the breath and the position
a moment only, shoulders down, chest out and up, abdomen in, then release the hand and slowly exhale. A rather vigorous exercise. So go slowly.
Exercise No. 4
Stand straight, arms extended even with the shoulders, head up;
tense muscles of right arm doubling slowly at elbow and hand only, until
the clenched fist touches the shoulders; at the same time tensing the
neck muscles, chin up, and turning the head slowly to face the clenched
fist. Repeat with the left arm. The arms from shoulder to elbow must
be kept in a horizontal position.
Exercise No. 5
Stand straight, hands at sides. Bend as far over to the right as
possible, slowly; then to the left as far as possible. Repeat 10 times.
Exercise No. 6
Stand straight, arms at sides. Lean as far forward as you can without
bending the knees and roll the body clear around in a circle to the
right, arms and body as limp as possible. Repeat 5 times. Then roll
five times to the left.
Exercise No. 7
Stand straight. Extend arms easily in front. Wave them backwards and
upwards in a sort of reversed swimming movement, until they meet
overhead; at the same time bending backward as far as possible slowly
inhale a full breath. Now bend forward, exhaling breath, taking care not
to bend the knees, until your fingers touch your toes, head hanging as
low as possible, toes and head as limp as possible, fingers reaching
towards the floor. Repeat upright position. Keep the knees straight
throughout. Aim to stretch the entire body and hands upward and backward as far as possible, with the upward motion of the arms. If you can't touch the floor without bending the knees, just come as near it as you can. Practice will limber you up until you can touch it.
Exercise No. 8
Lie full length on the back of the floor, hands clasped under head.
Tense the muscles of the right leg, raising the knee slowly until it
touches or almost touches the body, at the same time bending the foot
downward as far as possible, stretching the toes towards the floor. Now
slowly lower the right leg, still tense, towards the floor, straightening
the knee and turning the toe upward towards the body. As the right
leg is being lowered, raise the left one upward in the same way tensing
the muscles, knee to chest, toes stretching upward; as the left leg goes
down, point the toes and foot toward the knee 5 times, increasing
gradually to 10 times.
PHYSICAL EXERCISES
Exercise I
(1) Extend the arms straight out in front of you, on the level of
the shoulder, with palms of the hand touching each other; (2) swing
back the hands until the arms stand out straight, sideways, from the
shoulders or even a little further back if they will go there easily
without forcing; return briskly to position 1, and repeat several times.
The arms should be swung with a rapid movement and with animation and life. Do not go to sleep over the work or rather play. This exercise is
most useful in developing the chest, muscles of the shoulders, etc. In
swinging the hands backward, it is an improvement if you will rise on
your toe during the backward sweep; sinking on your heels as you move the arms forward again. The repeated movements should be rhythmical, backward and forward, like the swinging of a quick pendulum.
Exercise II
(1) Extend the arms straight in front of you, letting the little fingers
of each hand touch each other, the palms being upward; (2) then keeping
the little fingers still touching, bring the hands straight up in a
curved circular movement, until the tips of the fingers of both hands
touch the top of the head back of the forehead, the backs of the fingers
touching, the elbows swinging out as the movement is made until (when
the fingers touch the head, with thumbs pointing the rear) they point
out straight sideways; (3) let the fingers rest on the top of the head a
moment, and then with the elbows pressing back (which forces the
shoulders back) force the arms backward with an oblique motion until
they reach the sides at full length, as in the standing position.
Exercise III
(1) Extend the arms straight out, sideways, from the shoulders;
(2) then, still keeping the upper arms extended in same position, bend
the arms at the elbow and bring the forearm upward with a circular
movement, until the tips of the extended fingers lightly touch the tops
of the shoulders;
(3) then with fingers in the last position, force the
elbows out to the front until they touch, or nearly go (a little practice
will enable you to touch them together);
(4) then, keeping the fingers still lightly touching the tops of the shoulders, swinging the elbows as far back as you can get them. (A little practice will enable you to get them much farther back than at the first attempt.) (S) Swing the elbows to the front position and then back to the rear position, several times.
Exercise IV
(1) Place the hands on the hips, thumbs to the rear, and elbows pressed
back;
(2) bend the body forward, from the hips as far as you can, keeping
the chest protruding and the shoulders pressed back;
(3) raise the body to the original standing position (hands still at the hips) and then bend backward. In these movements the knees should not be bent and the motions should be made slowly and gently; (4) then (hands still on the hips) bend gently to the right, keeping the heels firmly on the ground, knees unbent and avoid twisting the body;
(5) resume original position, and then bend the body gently to the left, observing the precautions given in the last movement. This exercise is somewhat fatiguing and you should be careful not to overdo it at the start. Proceed gradually;
(6) with hands in same position on the hips, swing the upper part of the body around in a circle, from the waist-up, the head describing the largest circle, of course. Do not move the feet or bend the knees.
Exercise V.
(1) Standing erect, with hands on hips, raise yourself on the balls
of the feet several times, with sort of a springing motion. Pause a
moment after you have raised upon your toes, then let the heels sink to
the floor, then repeat, as above suggested. Keep the knees unbent and the heels together. This exercise is specially beneficial in developing the
calf of the leg, and will make it sure the first few times it is tried.
If you have an undeveloped calf here is the exercises for you;
(2) with hands still on hips place your feet about two feet apart, and then cover the body into a "squatting" position, pausing a moment and then resuming original position. Repeat several times, but not too often at the first, as it will make the thighs feel a little sore at the beginning. This
exercise will give one well developed thighs. This last movement may be
improved upon by sinking down with the weight resting upon the balls of
the foot, instead of upon the heel.
Exercise VI
(1) Stand erect with hands on hips;
(2) keeping the knee straight, swing the right leg out about fifteen inches (keeping the toe turned a little out and the sole flat)--then swing back to the rear until the toe points straight to the ground, keeping the knee stiff all the time;
(3) repeat the swinging backward and forward several times;
(4) then do the same with the left leg;
(5) with hands still on hips, raise the right leg up, bending the knee, until the upper-leg (thigh) stands straight out from the body (if you can raise it still higher, you may do so);
(6) place your foot again on the ground, and go through the same motion
with the left leg;
(7) repeat several times, first one leg and then the other, moving slowly at first and gradually increasing your speed until you are executing a slow trot without moving from the over spot.
Exercise VII
(1) Stand erect, with the arms extended straight in front of you, from
the shoulders, and of course on a level with the shoulders--the palms
must be down, fingers straight out, thumbs folded under and the thumb
side of hands touching each other;
(2) bend the body forward from the hips, stooping forward as far as possible and at the same time swing the arms forward with a sweeping movement, sending them down, backward and upward at the back, so that when the body has reached the limit of the bending forward movement the arms are extended back and over the body--keep the arms stiff and do not bend the knees;
(3) resume standing position and repeat several times.
Exercise VIII
(1) Extend the arms straight, sideways, from the shoulder and hold them
there stiff and rigid with hands open;
(2) close the hands forcibly with a quick motion, pressing the fingers well into the palm;
(3) open the hands forcibly and quickly, spreading out the fingers and thumbs as widely as possible forming a fan shaped hand; (4) close and open the hands as above stated, several times, as rapidly as possible. Put life into the exercise. This is a splendid exercise for developing the
muscles of the hand and for acquiring manual dexterity.
Exercise IX
(1) Lie upon your stomach, extending your arms above your head and then bowed upward and your legs stretched out full length and raised backward and upward. The correct position may be carried in the mind by imagining a watch--crystal or a saucer resting on the table on its middle, with both ends turning upward;
(2) lower and raise the arms and legs, several times;
(3) then turn over on your back and lie extended at full length,
with arms extended straight out upwards over the head, with back of
fingers touching the ground;
(4) then raise up both legs from the waist until they stand straight up in the air, like the mast of a ship, your upper-body and arms remaining in the last position named. Lower the legs and raise them several times;
(5) resume position 3, lying flat upon the back at full with arms extended straight out upward, over the head, with backs of fingers touching the ground;
(6) then gradually raise body to sitting position, with arms projecting straight in front of the shoulders. Then go back gradually to the lying down position, and repeat the raising and lowering several times;
(7) then turn over on the face and stomach again and assume the following position:--Keeping the body rigid from head to foot, raise your body until its weight rests upon your palms (the arms being stretched out straight in front of you) at one end, and upon your toes at the other end. Then gradually bend arms at the elbow, allowing your chest to sink to the floor; then raise up your chest and upper-body by straightening out your arms, the entire weight falling upon the arms, with the toes as a pivot--this last is a difficult motion, and should not be overdone at first.
Exercise X
This exercise is for those troubled with a too large abdomen, which
trouble is caused by too much fat gathering there. The abdomen may
be materially reduced by a reasonable indulgence in this exercise--but
always remember "moderation in all things" and do not overdo matters,
or be in too much of a hurry. Here is the exercise:
(1) exhale the breath (breathe out all the air in the lungs, without straining yourself too much) and then draw the abdomen in and up as far as you can, then hold for a moment and let it resume its natural position. Repeat a number of times and then take a breath or two and rest a moment. Repeat several times, moving it in and out. It is surprising how much control one may gain over these stubborn muscles with a little practice. This exercise will not only reduce the fatty layers over the abdomen, but will also greatly strengthen the stomach muscles. (2) Give the abdomen a good but not rough kneading and rubbing.
Exercise XI
The exercise is as follows:--Follow it carefully.
(1) stand erect, with heels together, toes slightly pointed outward;
(2) raise the arms up by the sides (with a circular movement) until the hands meet over the head, thumbs touching each other;
(3) keeping the knees stiff; the body rigid; the elbows unbent; (and shoulders bent well back as the movement is made); bring down the hands, slowly, with a sideway circular motion, until they reach the sides of the legs the little finger and the inner-edge (the "chopping-edge") of the hand alone touching the legs, and palms of the hands facing straight to the front. The shoulder gets the right position by touching the little finger of each hand to the seam of the trousers.
(4) Repeat several times, slowly remember. With the hands
in the last position, having been placed there by the motion stated, it
is very difficult for the shoulders to warp forward. The chest is
projected a little; the head is erect; neck is straight, the back
straight and hollowed a little (the natural position); and the knees are
straight. In short, you have a fine, erect carriage--now keep it.
SEVEN MINOR BREATHING EXERCISES.
Exercise I.
(1) Stand erect with hands at sides. (2) Inhale complete breath.
(3) Raise the arms slowly, keeping them rigid until the hands touch over
head. (4) Retain the breath a few minutes with hands over head. (5)
Lower hands slowly to sides exhaling slowly at the same time. (6)
Practise cleansing breath.
Exercise II.
(1) Stand erect with arms straight in front of you. (2) Inhale
complete breath and retain. (3) Swing arms back as far as they will go;
then back to first position; then repeat several times, retaining the
breath all the while. (4) Exhale vigorously through mouth. (5) Practise
cleansing breath.
Exercise III
(1) Stand erect with arms straight in front of you. (2) Inhale complete
breath. (3) Swing arms around in a circle, backward, a few times. Then
reverse a few times retaining the breath all the while. You may vary this
by rotating them alternately like the sails of a wind-mill. (4) Exhale
the breath vigorously through the mouth. (5) Practise cleansing breath.
Exercise IV
(1) Lie on the floor with your face downward, and palms of hands flat
upon the floor by your sides. (2) Inhale complete breath and retain.
(3) Stiffen the body and raise yourself up by the strength of your arms
until you rest on your hands and toes. (4) Then lower yourself to
original position. Repeat several times. (5) Exhale vigorously through
the mouth. (6) Practise cleansing breath.
Exercise V
(1) Stand erect with your palms against the wall. (2) Inhale complete
breath and retain. (3) Lower the chest to the wall, resting your
weight on your hands. (4) Then raise yourself back with the arm muscles
alone, keeping the body stiff. (5) Exhale vigorously through the mouth.
(6) Practise cleansing breath.
Exercise VI
(1) Stand erect with arms "akimbo" that is with hands resting around the
waist and elbows standing out. (2) Inhale complete breath and retain. (3)
Keep legs and hips stiff and bend well forward, as if bowing, at the same
time exhaling slowly. (4) Return to first position and then take another
complete breath. (5) Then bend backward exhaling slowly. (6) Return to
first position and take a complete breath. (7) Then bend sideways
exhaling slowly (vary by bending to right and then to left). (8) Practise
cleansing breath.
Exercise VII
(1) Stand erect or sit erect with straight spinal column. (2) Inhale a
complete breath but instead of inhaling on a continuous steady stream,
take a series of short, quick "sniffs" as if you were smelling aromatic
salts and ammonia and did not wish to get too strong a "whiff." Do not
exhale any of these little breaths, but add one to the other until the
entire lung space is filled. (3) Retain for a few seconds. (4) Exhale
through the nostrils in a long restful breath. (5) Practise cleansing
breath.
WHEN YOU ARE IN TRAINING.
Do not attempt to take all the above exercises at one and the same
time. Take them several times in the day. Never exercise immediately
after a meal or before it. Do not try to force development as you will
be apt to suffer from re-action. Slow and steady wins the race. Gentle
and persistent exercises are advisable. That will lead to permanent
development.
The Doctrine and Practice of Yoga
by Swami Mukerji
YOGI OF THE SOUTH INDIA ORDER
Most Popular Search Terms:
Most Popular Search Terms: